


Regular Tesla ultrasonic sensor cover replacement with Original Equipment Manufacturer (OEM) parts is crucial for maintaining optimal sensor performance and vehicle safety. These covers protect against dirt, debris, and damage, ensuring compatibility, reliability, and enhanced obstacle detection for features like adaptive cruise control and lane departure warning. DIY installation involves acquiring model-specific covers from an authorized dealer, removing the old cover, cleaning the area, securing the new one with matching screws, and testing sensor functionality.
Looking to upgrade your Tesla with a new ultrasonic sensor cover? This comprehensive guide is your go-to resource. We’ll delve into the intricate world of Tesla’s ultrasonic sensor system, explaining its vital role in advanced driver assistance features. Discover why replacing the cover isn’t just an aesthetic choice but a solution to potential issues. Then, follow our easy step-by-step installation process using OEM components for a seamless fit and improved performance.
- Understanding Tesla's Ultrasonic Sensor System
- Why Replace the Cover? Common Issues & Benefits
- Step-by-Step Guide: Installing OEM Replacement Covers
Understanding Tesla's Ultrasonic Sensor System

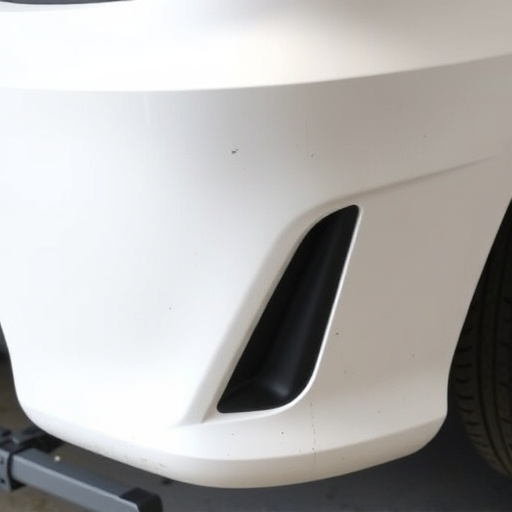
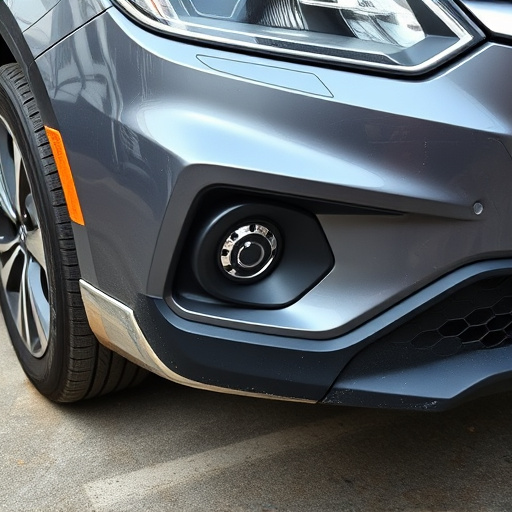
Tesla’s Ultrasonic Sensor System is a sophisticated technology designed to enhance safety and navigation for the vehicle. This system utilizes a network of sensors that emit ultrasonic waves to detect obstacles, helping the car park precisely and avoid collisions. The cover protects these sensors from dirt, debris, and potential damage, ensuring their optimal performance. When considering a Tesla ultrasonic sensor cover replacement, using OEM (Original Equipment Manufacturer) components is crucial for maintaining the integrity of the system.
A well-maintained sensor system offers numerous benefits, including improved car restoration capabilities and efficient tire services. Moreover, for businesses providing fleet repair services, keeping these sensors in top condition is essential to guarantee safe operations and maintain customer satisfaction. Therefore, when it comes to replacement parts, selecting OEM components ensures compatibility and reliability, ultimately contributing to the overall efficiency of the vehicle’s safety features.
Why Replace the Cover? Common Issues & Benefits
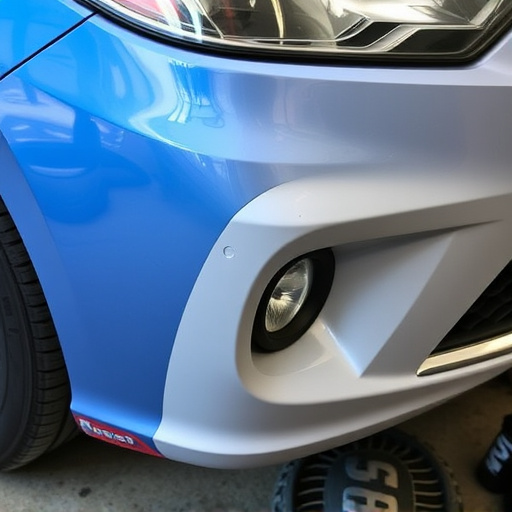
The Tesla ultrasonic sensor cover replacement is a crucial component of routine maintenance for any luxury vehicle owner. While it may seem like a minor part, the cover plays a vital role in protecting the sensitive ultrasonic sensors beneath it. Over time, this cover can suffer from collision damage repair or wear and tear, leading to reduced performance and potential failures in the vehicle’s advanced safety systems.
Replacing the Tesla ultrasonic sensor cover with OEM (Original Equipment Manufacturer) components offers several benefits. Firstly, it ensures optimal functionality of the sensors, which are responsible for features like adaptive cruise control, lane departure warning, and automatic parking. Secondly, a replacement cover helps maintain the vehicle’s aesthetic appeal, as it can be restored to its original condition, aligning with the vehicle body repair standards of the luxury car market. This simple yet effective upgrade contributes to enhanced safety and peace of mind for Tesla owners, addressing common issues related to sensor performance and ensuring the longevity of their vehicle’s cutting-edge technology.
Step-by-Step Guide: Installing OEM Replacement Covers
Installing OEM replacement covers for your Tesla ultrasonic sensor is a straightforward process that can be accomplished with the right tools and guidance. Begin by purchasing high-quality covers designed specifically for your Tesla model from an authorized dealer or trusted supplier, ensuring compatibility with your vehicle’s make and year. Next, gather the necessary tools: a screwdriver suitable for Tesla models, a clean microfiber cloth, and, if needed, a dent repair kit for any minor cosmetic imperfections along the bumper.
With your workspace prepared and all components ready, carefully remove the damaged or existing cover by unscrewing it from the sensor. Take note of its orientation to ensure proper alignment during installation. Clean the sensor area thoroughly with the microfiber cloth to eliminate any dust or debris. Now, apply the new OEM cover, ensuring it fits snugly over the ultrasonic sensor. Secure it in place using the appropriate screws, matching the original mounting pattern for a seamless fit. Finally, double-check that all components are correctly installed and test the sensor functionality to guarantee optimal performance in detecting obstacles and enhancing your Tesla’s safety features.
Upgrading your Tesla with a high-quality ultrasonic sensor cover replacement is a straightforward process that offers numerous advantages. By using OEM components, you ensure compatibility and maintain the vehicle’s original aesthetics. This simple fix addresses common issues like sensor malfunction due to debris or damage, enhancing safety features for smoother driving. Following the step-by-step guide ensures a successful installation, allowing you to enjoy enhanced ultrasonic sensor performance without compromising on style. Remember, when it comes to Tesla ultrasonic sensor cover replacements, using authentic OEM parts is key.